
Conecting to AWS IAM account from windows
This post will help you to use AWS services for Machine learning.
Launching an instance
- Login in to IAM account from here.

- First step will redirect you to the below screen. Change Location to N.Virginia which is on the top right corner of the screen.

- Click on EC2 which is under compute on the left side of the screen or Go to services and Click on EC2

- Last step will redirct you to the below screen. Click on the Launch instance (Blue button).

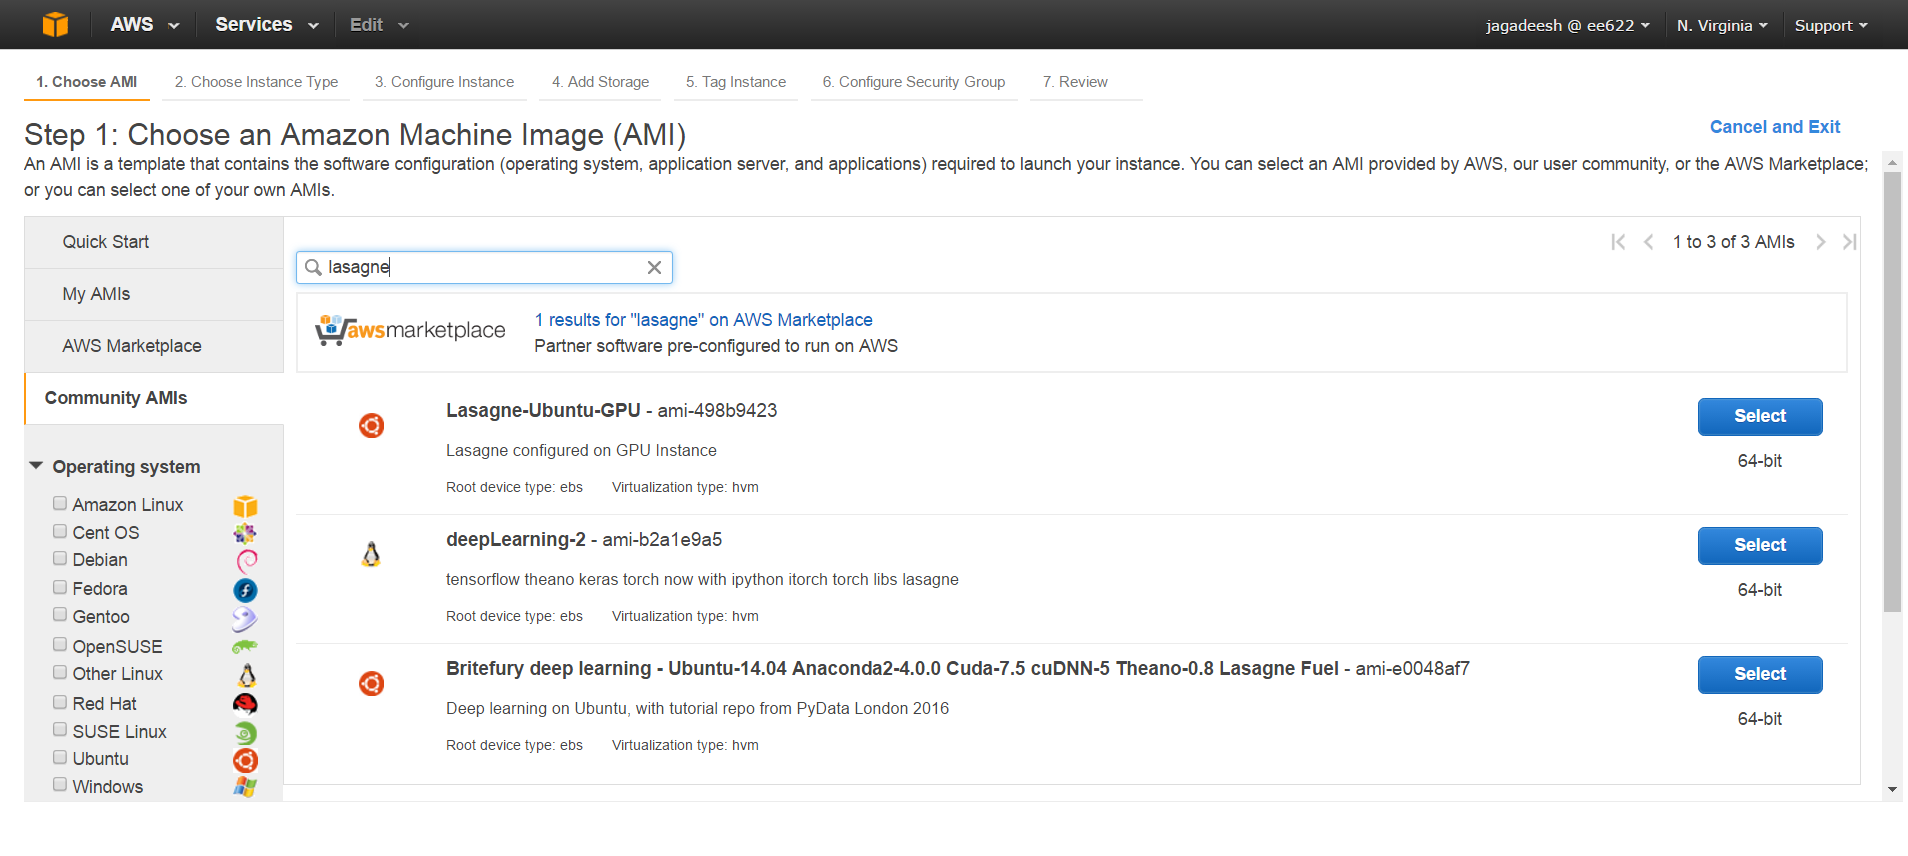
- Go to Community AMI which is on the left side of the screen. You will see a screen like below. Search for Lasagne, or Keras, or Theano, or Caffe, or Torch. You will find some pre-built gpu’s and select one of them which is having CUDA,cuDNN.
- Choose an instance: Scroll down and select a g2.2xlarge instance. Click on Review and launch (bottom -right corner).

- Last step will redirect you to the below screen. Just click on launch button.

- Now select the option “Create a new key pair” and give your name, store it in a place where you can easily access it in later point of time. It will be a .pem file

- If you have done all the above steps correctly, it will redirect you to the below scrren where you can see Your instances are launching.Immediately, click on the View instances button which is on the bottom right corner of the screen shown below.

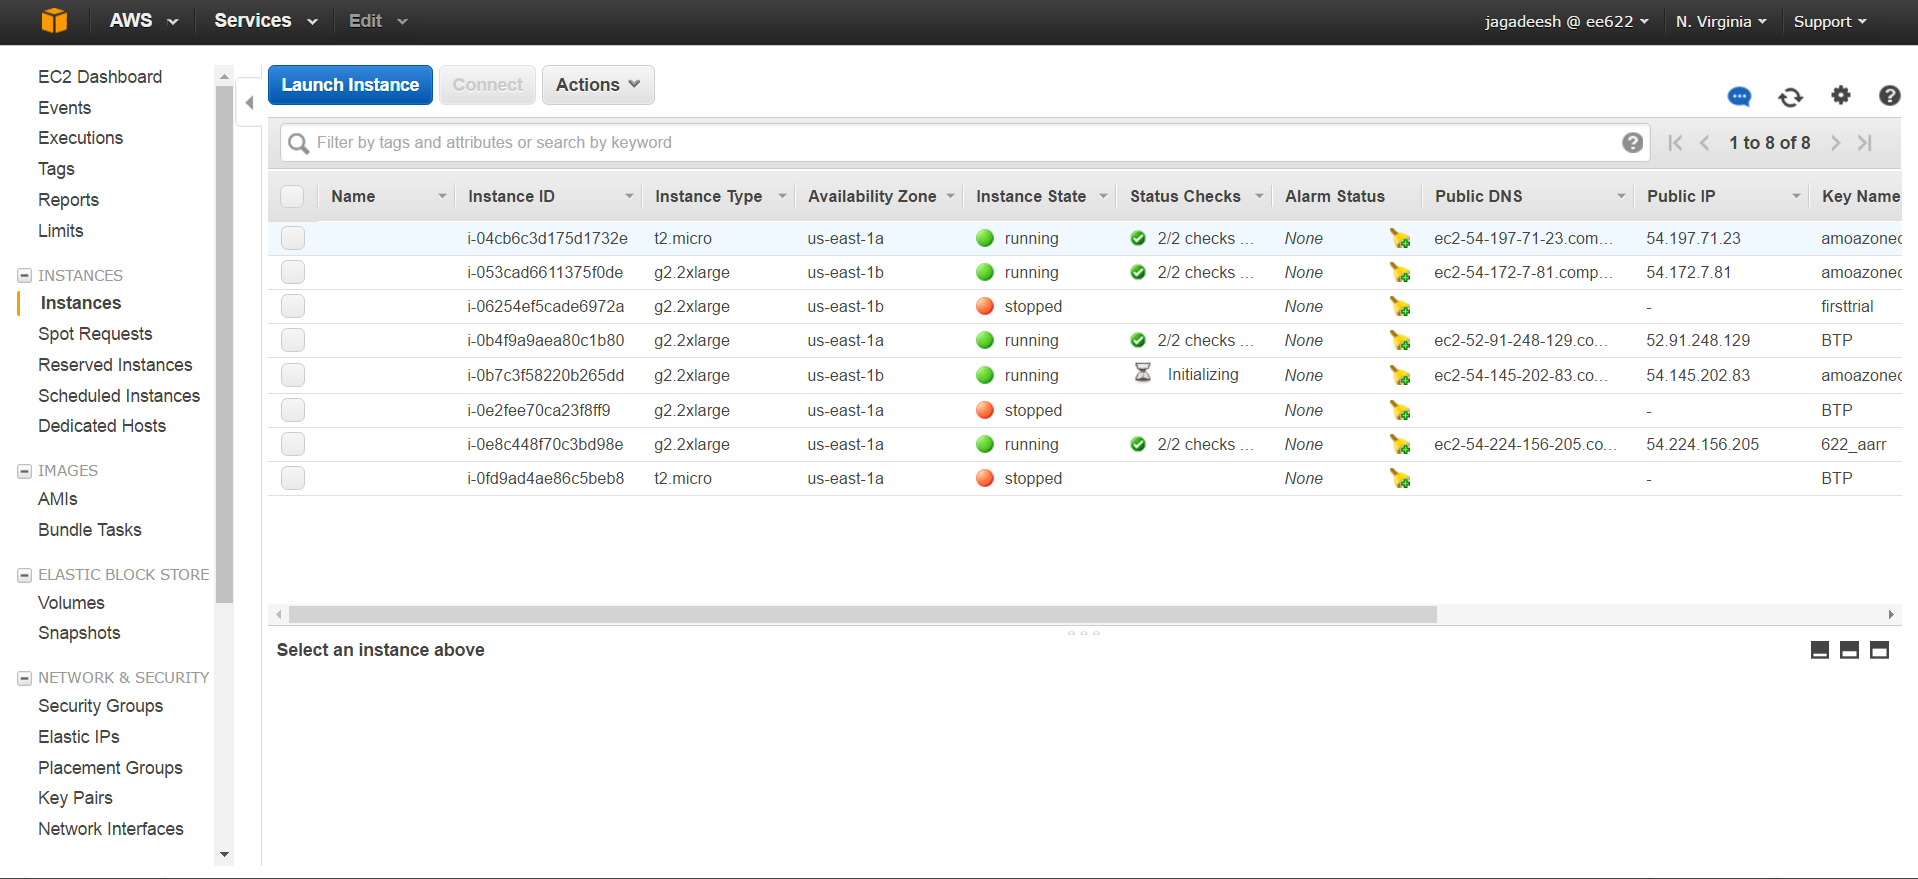
- Newly created instance is the one which is showing Initializing under Status Checks column. Select it and note the instance id so that you can keep track on your instance.
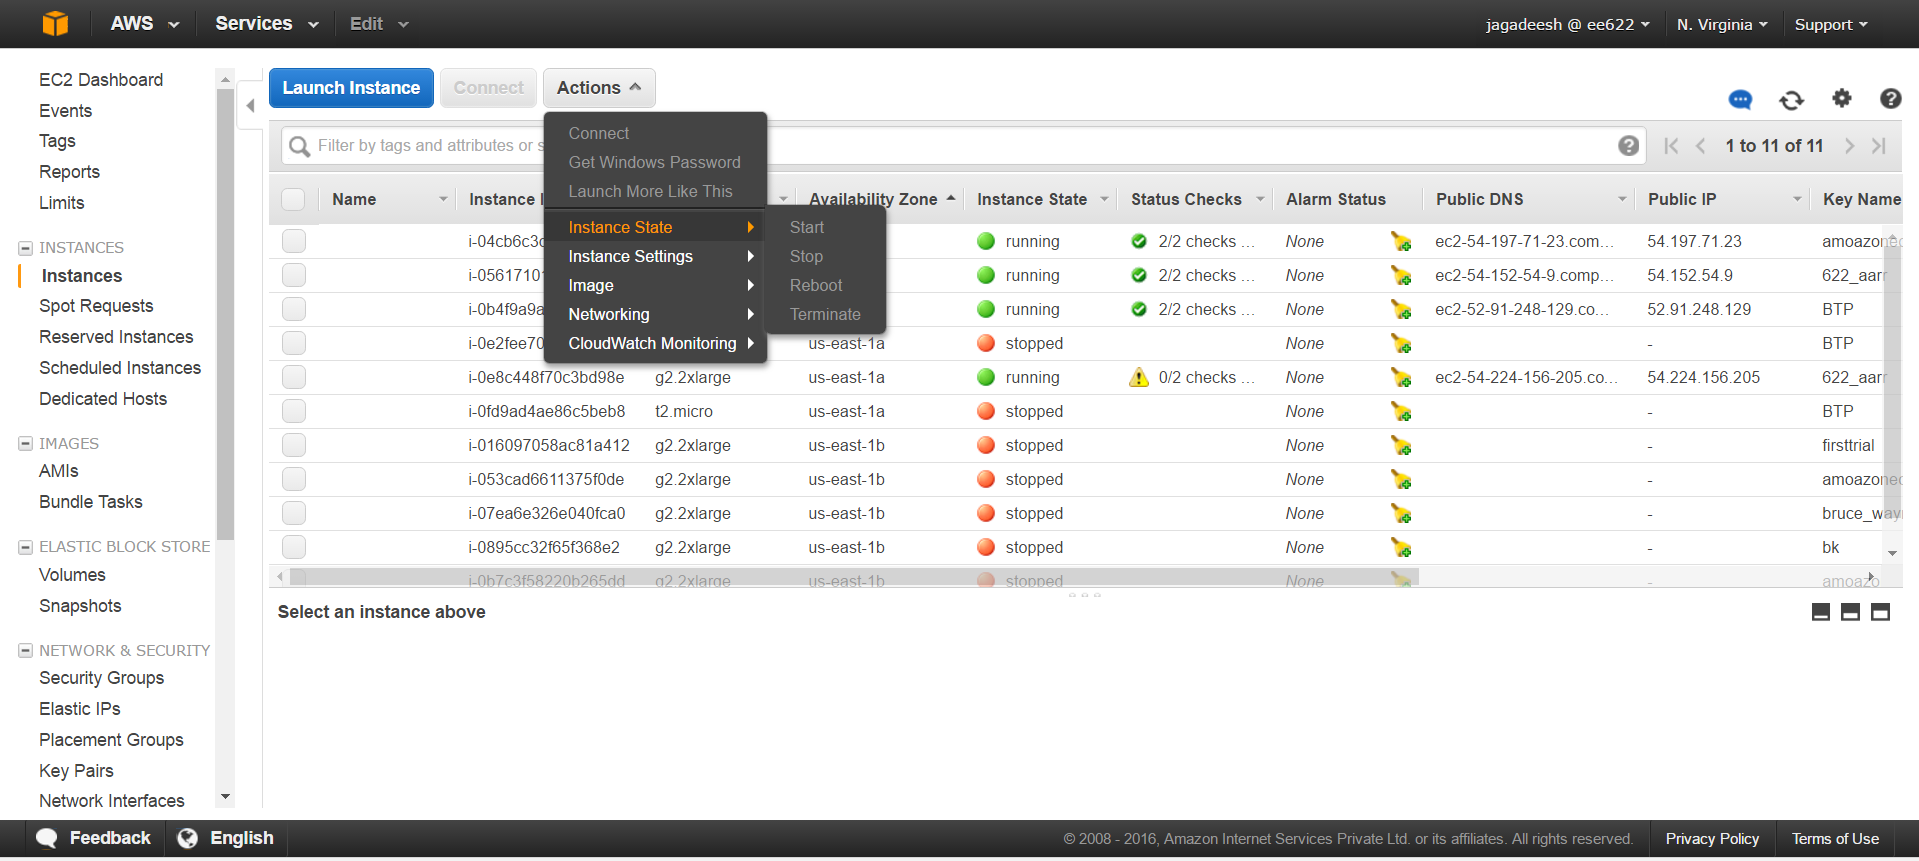
- If you are not using instance, just stop it. So that, you won’t be charged. You can do it like below.
This is all about setting up an instance on Amazon web services.
Requirements
- Putty and Puttygen
- Tor browser
- WinSCP
Setting up Tor browser.
- Download Tor browser from here
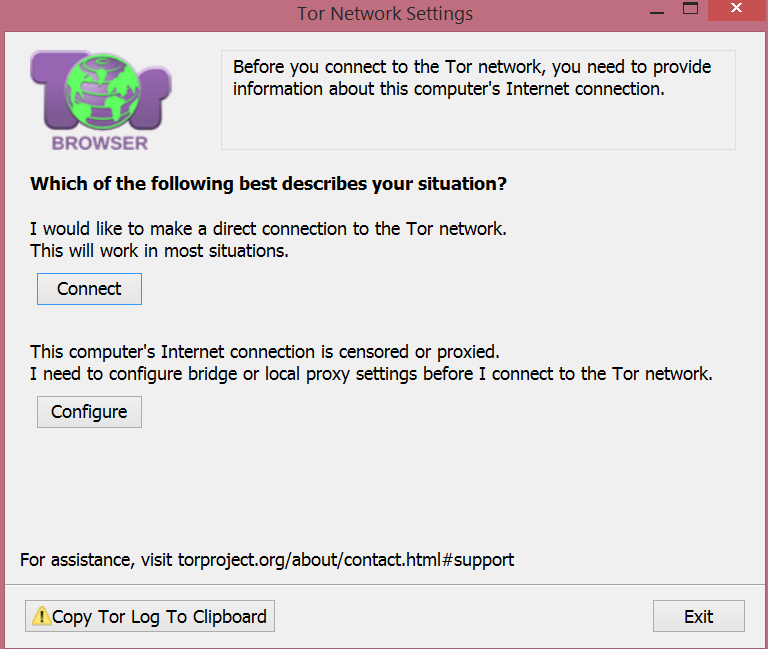
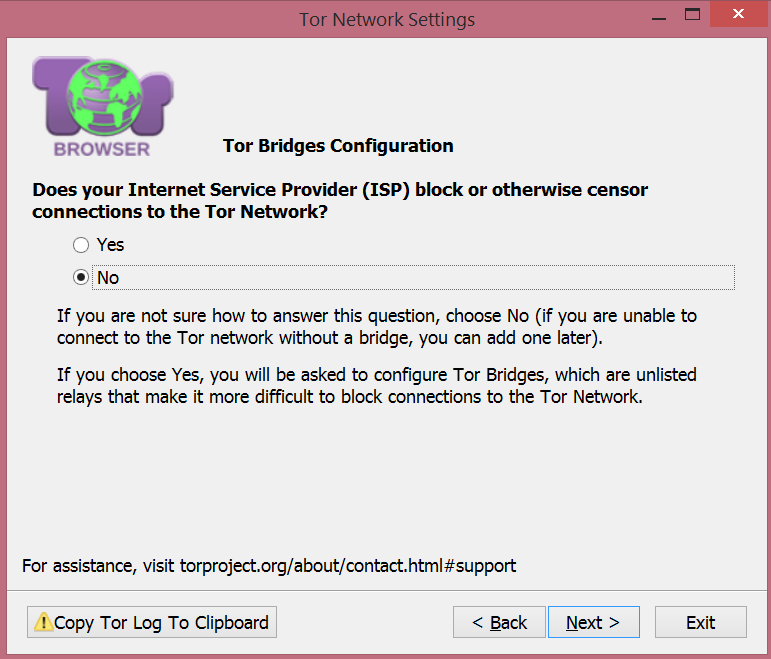
- Start you tor browser. You will see the below screen and select Configure option which is shown in the image. Click on next.
- Select No option which is shown on the image and click on next.
- Select Yes and Click on next.

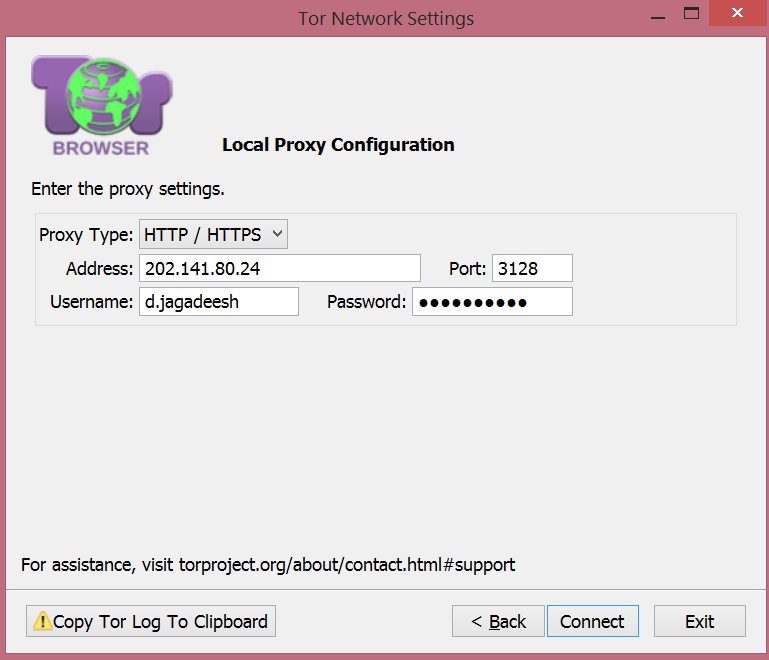
- Select HTTP/HTTPS for proxy type and Address:202.141.80.24 Port:3128. Give your webmail username and password.
- If you want to launch putty, you have start the Tor browser first and then launch putty.
Putty and Puttygen
- Download puttygen and putty from here
- Run the executable file of puttygen and you will see the below screen. Click on load option and upload your .pem file.

- Click on Save private key option and store it in the form of .ppk format. It will be required for making connection to the system.
- Run the executable file of putty and you will see a screen like below.

- In Session , give your hostname as ubuntu@Public DNS, Port as 22.
- Click on proxy, which is on the left side of the window. Select SOCKS5 and Proxy hostname as localhost and port as 22.

- Click on Auth, which is on the left side of the window. Select Browse and upload your .ppk file.

- In Auth, select Tunnels option. Give source port as 8888 and Destination as localhost:80.

- Click on Session, which is on the top left corner and give some name under Saved sessions, save it first and then click on open.

WinSCP
- Download WinSCP from here.
- Run WinSCP in your system and you will get a screen like below.
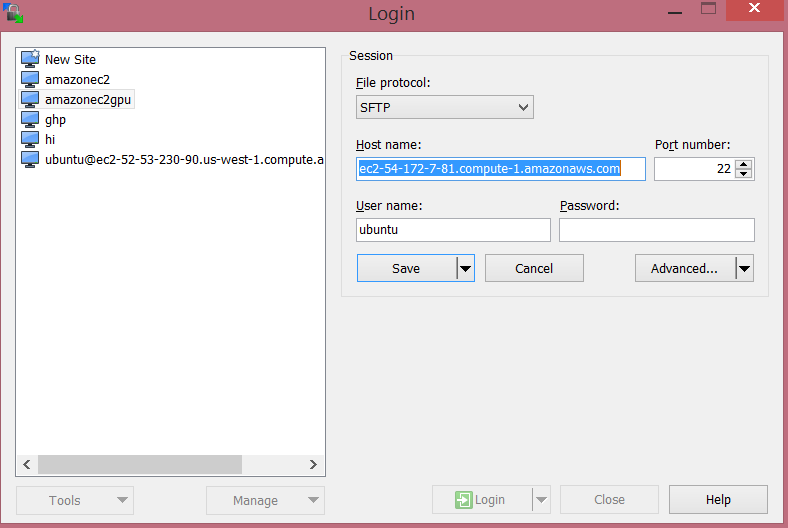
- Click on New site(top left corner) and give Hostname as your Public DNS, port as 22, username as ubuntu(If you have choosen ubuntu initially)
- Click on Advanced and you will see a screen like below. Click on proxy which is on the left side and make changes as shown in the image.

- Click on Authentication and upload your .ppk file and make changes as shown in the image. Click Ok.

- CLick on Save and give some session name.
- Click on login and finally you will see a screen like below.

- If you right click on the folder which you want to transfer into the instance, you will get an option upload, just click on it and your files will be transfered.
Happy Deep learning
Written on October 26, 2016